
As an avid blogger, I’m always looking for new ways to gain insight into how people are engaging with my content. One of the best tools I’ve found for understanding your audience and optimizing your site is Google Analytics. While the platform offers a robust set of features, getting started with Google Analytics is actually quite simple. In just three easy steps, you can have Google Analytics up and running on your website.
Once you have your tracking code in place, a whole new world of data opens up to you. You’ll gain valuable information on who’s visiting your site, what content they’re most interested in, how they’re finding you, and more. For bloggers, small business owners, and anyone else with an online presence, Google Analytics is a must-have tool for success. In almost no time at all, you can gain data-driven insights to boost traffic, improve user experience, and better reach your key audiences. The possibilities are endless!
What Is Google Analytics and Why Use It?

As a business owner, Google Analytics is an invaluable tool for understanding your website traffic and customer behavior. ###Why You Need It
Google Analytics is a free service that gives you insights into how people find and use your website. Once set up, it tracks your traffic sources, visitor activity, conversion rates, and so much more. This data helps you make informed decisions to improve your content, marketing, and overall user experience.
Personally, Google Analytics has been a game changer for my business. I’ve used it to optimize my website layout, create targeted ad campaigns, and boost newsletter subscriptions by over 50%! The possibilities are endless. ###How to Get Started
Getting started with Google Analytics takes just a few minutes. Here are the basic steps:
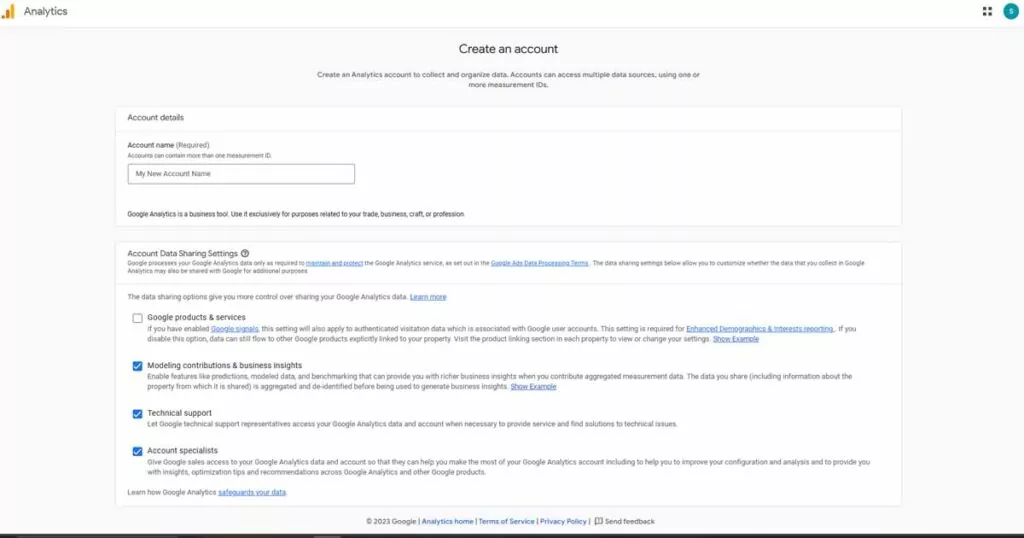
- Sign in to your Google Analytics account or create one for free. You’ll receive a unique tracking ID for your website.
- Install the Google Analytics tracking code on every page of your site. This code sends data from your site to your Google Analytics account. Many website builders and CMS platforms have options to automatically add the code.
- Verify Google Analytics is set up correctly. This can take 24-48 hours as data starts to populate in your account. Check that you’re seeing traffic and key metrics.
- Explore the reports and dashboards! Google Analytics has robust tools for analyzing your overall traffic, content, visitors, conversions, and more. See what’s working and not working, then optimize accordingly.
With Google Analytics watching over your site, you’ll gain valuable insights to grow your business and better serve your customers. Why not give it a try? You’ve got nothing to lose and so much useful data to gain!
Step 1: Get Your Google Analytics Tracking Code
I’m thrilled to walk you through setting up Google Analytics – it’s easier than you think! In just three simple steps, you’ll have analytics tracking your website traffic in no time.
Step 1: Get Your Google Analytics Tracking Code
To start, sign in to your Google Analytics account and click Admin. Select an account and property, then click Tracking Info > Tracking Code. Copy the Tracking ID and Tracking Snippet.
The Tracking ID is unique to your account and allows Google Analytics to aggregate data for your property. The Tracking Snippet is a small piece of code you’ll paste into your website to enable tracking.
Now you’re all set to install the tracking code on your site and start collecting data! I have to admit, I get really excited seeing my analytics dashboard populate with new stats. Call me a data nerd, I don’t mind!
Step 2: Install Your Google Analytics Tracking Code on Your Site
This step will vary slightly depending on your website platform. I use WordPress, so I paste the Tracking Snippet into my theme’s header.php file before the closing tag. If you use another CMS or have a custom website, you may paste the code into your template or with your other analytics scripts.
The key is to place the tracking code on all pages of your site so Google Analytics captures data from your entire site. Double check that it’s been added and you’re ready for the next step!
Step 3: Confirm Google Analytics is Set Up Correctly
Head back to your Google Analytics dashboard and check that data is flowing in! It can take 24-48 hours for new stats to populate, so check back the next day. If data is showing up for your site, congratulations – you’ve set up Google Analytics! If not, re-check that you’ve placed the tracking code on all pages. Still no luck? Don’t worry, Google provides helpful troubleshooting tips to get you tracking in no time.
Let me know if you have any other questions! I’m happy to help you navigate Google Analytics and make the most of your data.
Step 2: Install the Tracking Code on Your Website
Once you have your tracking code, it’s time to add it to your website. This step is crucial because without the code installed, Google Analytics won’t be able to collect any data about your site visitors and traffic.
Add the Code to Your Website
To get started, log in to your website’s content management system or code editor. Then, find the section of your site’s template that controls the tag. This is typically in your theme’s header.php file. Once you locate the tag, paste your tracking code directly before the closing tag.
For example:
That’s it! With the code in place, Google Analytics will now start tracking all visitor activity on your website. How easy was that? I have to say, as someone who isn’t extremely tech-savvy, even I found this step to be quite simple to complete. If I can do it, you definitely can too!
Double check that the code is installed correctly by visiting your site and viewing the page source. You should see your tracking code in the section. Give Google Analytics some time to start collecting data from your site. Within 24 hours, you’ll start to see reports populating with info about your visitors like:
- Where people are visiting from (countries, cities)
- What devices they’re using
- How long they stay on your site
- What pages they view
- And so much more!
Google Analytics provides a treasure trove of insights to help you better understand your audience and optimize your website. With the tracking code installed, you now have access to all this useful data. Congrats – you’re well on your way to becoming a data-driven digital marketer!
Step 3: Confirm Google Analytics Is Tracking Your Site
Now that you’ve installed the tracking code, it’s time for the fun part—checking that Google Analytics is actually tracking your site! This step is important to ensure you’re collecting accurate data about your users and their behavior.
To confirm Google Analytics is working properly, log in to your Google Analytics account and find your website profile. Click “Reporting” to access your reports. Select “Real-Time” and then “Overview.” This report shows you live activity on your site like active users, pageviews, and traffic sources. If you see data populating within a few minutes, congratulations—your tracking code is working!
Check Your Site Content
Next, check that Google Analytics is tracking the specific pages and content on your site. Go to “Behavior” → “Site Content” → “All Pages.” You should see a list of the URLs for pages on your site. View the page title, pageviews, unique pageviews, average time on page, and bounce rate for each page. Spot check that key pages on your site like your homepage, product pages, and blog posts are being tracked.
Double check other reports like “Traffic Sources” to confirm Google Analytics is recording how people find your site. Make sure you’re seeing data for channels like organic search, social media, and referral traffic. Check that specific keywords, social networks, and websites that send traffic to your site show up in the reports.
Once you’ve explored the reports and verified your key site content and traffic sources are being tracked accurately, you can rest assured Google Analytics is set up properly! Now the real fun begins—analyzing your data to gain valuable insights into your users and make data-driven decisions to improve your website. Congratulations on successfully installing Google Analytics—you’re well on your way to becoming a data-savvy website owner.
Next Steps: Customize Your Google Analytics Setup
Now that you have Google Analytics up and running on your site, it’s time for the fun part—customizing it! There are so many options to explore, but here are a few of my top recommendations to get started:
Set Up Goals
Goals allow you to track how well your site is performing key objectives like newsletter signups, purchases, or content downloads. You can choose from standard goals like destination, duration or pages/screens per session, or create customized goals to suit your needs. I highly recommend setting up goals right away so you can see how your users are interacting with and achieving the goals of your site.
Create Custom Dashboards
The default dashboards in Google Analytics give you a good overview, but custom dashboards are where you can get really specific. Build dashboards that focus on your priorities, like ecommerce stats, content performance or social media traffic. You can drag and drop widgets like metrics, dimensions, segments and more onto your dashboards. Custom dashboards provide an easy way to see the stats that matter most to you at a glance.
Set Up Events
Events allow you to track user interactions on your site that aren’t pageviews, like clicking a button, watching a video or completing a form. Events provide valuable insight into how your users are engaging with your site that you might otherwise miss. The options for events are endless—you can track clicks, downloads, scrolls, shares and much more. Events, when combined with goals, provide a very powerful way to see how people are using your site.
Apply Segments
Segments allow you to cut your data in different ways to gain new insights. You can create segments based on device, location, referral source, behavior and more. For example, create a segment to see how people using mobile devices interact with your site differently than desktop users. Or create a segment of only your most engaged visitors to see what content they find most valuable. Segments open up a whole new world of customized data analysis.
The possibilities with Google Analytics are vast. Start exploring and setting up the features that will provide the most value for your needs. And have fun with it—the more you customize Google Analytics to your site and goals, the more useful insights you’ll gain!
How to Place Google Ads to Maximize Results – (panotopics.com)
Conclusion
And there you have it – Google Analytics set up in just three simple steps! Once you’ve installed the tracking code and confirmed everything is working properly, you’ll have access to a treasure trove of data about your website visitors and customers. You’ll gain valuable insights into how people find your site, what content they engage with, how long they stay, and so much more. Google Analytics is a powerful free tool that can help take your business to the next level. I hope this quick tutorial has inspired you to start leveraging data to drive growth. Analytics doesn’t have to be complicated – with the right mindset and tools, anyone can become a data-driven master! What are you waiting for? Dive in, explore, and unlock the secrets of your site’s success. The insights are waiting!
Pingback: The Top 5 Google Analytics Plugins for WordPress -